Articles in this topic
Your first steps
Open the website editor, find your way around the screen, and publish your first change.
7 min read
This guide walks you through the website editor once: from opening it, through a short tour of the screen, to publishing your first change. Take your time — nothing you do here reaches your guests until you click Publish.
Open the website editor
-
Sign in to Clava with your email address and password. See Signing in.
-
If you see an orange switcher at the top right of the screen, make sure it says Configuration. If it says something else (for example Booking Management), click it and choose Configuration.
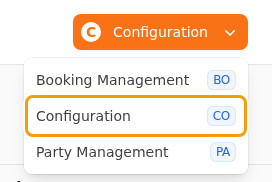
The switcher at the top right, with Configuration chosen -
In the menu on the left, under Venue Setup, click Website Builder.
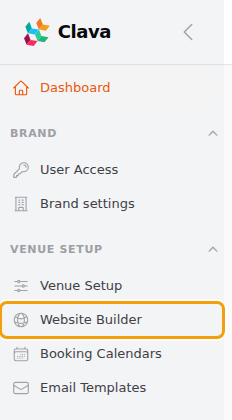
Website Builder in the menu on the left, under Venue Setup -
The editor opens with your home page. The first time, it can take a few seconds to load.
Tip
Use a computer or a laptop for the website editor. It needs a wide screen, and some buttons — for example those of pages, sections and photos — only appear when you point at them with the mouse. On a phone you can look at your website, but not edit it comfortably.
Good to know
You don't see Configuration or Website Builder? Only admins can edit the website. Ask the owner of your Clava account to give you the Admin role. See Roles.
Tip
Do you have more than one restaurant? Choose the location you want to edit at the top left of the editor. See Several locations.
A tour of the editor
The editor has seven areas:
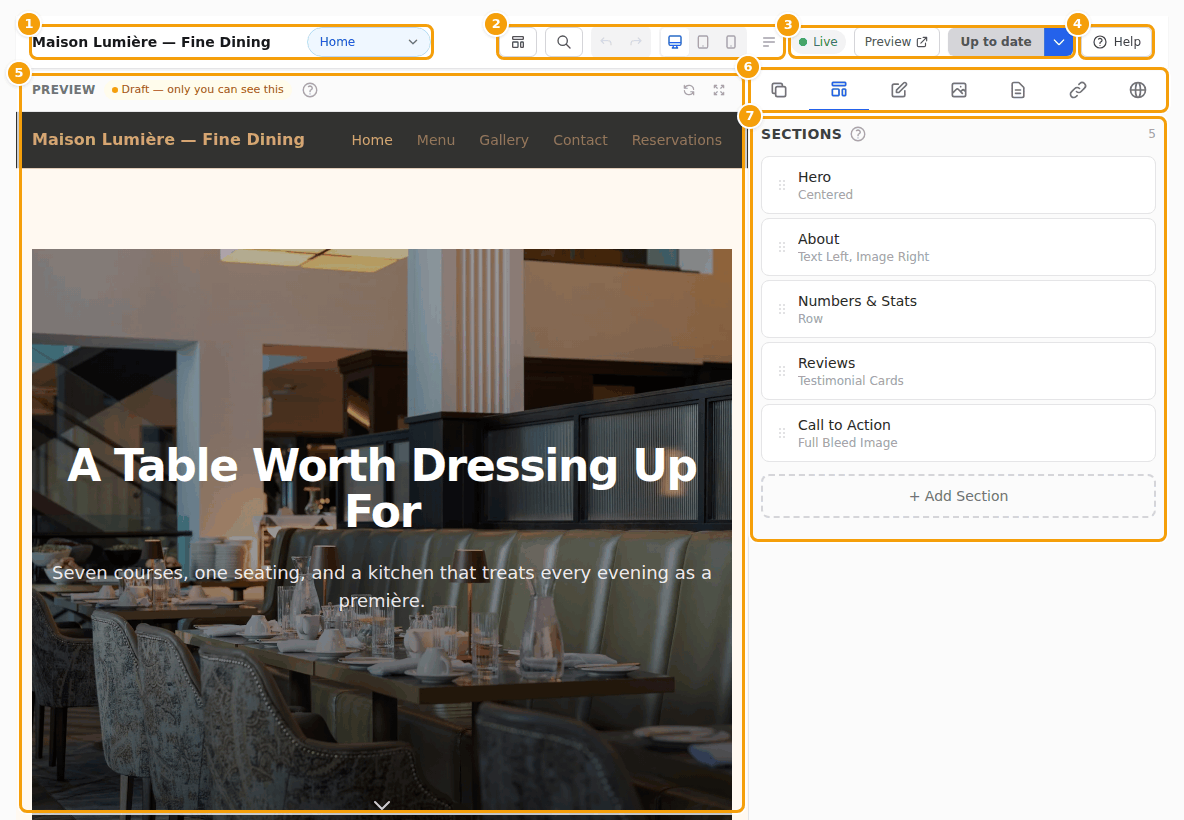
| Area | What you do there | |
|---|---|---|
| 1 | Name and pages | The name of your website, and the page you are working on. Click the page name to switch to another page (Home, Menu, Gallery …). On a wide screen you see a tab for each page instead. |
| 2 | Tools | Templates (the icon with three blocks), SEO Settings (the magnifying glass — how your website appears in Google), undo and redo, the screen size (computer, tablet, phone), and hide or show the side panel. |
| 3 | Status and publishing | See whether your website is live, open the Preview, and Publish. The small arrow next to Publish has more options, such as View live site and Version history... |
| 4 | Help | Opens this help right next to your work. |
| 5 | Preview | Your draft, exactly as guests will see it after you publish. You can click a section here to pick it. |
| 6 | Side panel tabs | Switch between pages, sections, the editor, photos and settings (see below). |
| 7 | Side panel | This is where you make your changes. It shows the tab you picked — here, the sections of the home page. |
The name at the top left is your website's Site Title — the name guests see at the top of your website. If you haven't set one yet, the editor shows your location's name or simply Your website. You change it in the Site tab. See Your website's name.
Tip
Not sure what a small button does? Rest your mouse on it for a moment and its name appears.
Help while you work
You never have to search for this help. It opens in a panel on the right side of the screen, so you can read and work at the same time:
- Help at the right end of the toolbar opens the help for the website editor.
- The small ? next to a heading — for example next to Sections or Draft — only you can see this — opens the help for exactly that part of the screen.
- Messages in the editor have a Learn more link that explains what the message means and what to do.
- The first time you open the editor, a blue banner offers a short guide: click Show me around to open this tour. Click the cross to hide the banner.

Elsewhere in Clava, the round ? at the top of the screen opens the help for the page you are on.
The side panel
The row of icons at the top of the side panel opens its tabs. From left to right:

| Tab | What you find there | |
|---|---|---|
| 1 | Pages | All pages of your website: add, rename, sort and delete them. See Pages. |
| 2 | Sections | The building blocks of the page you're on: add, move, hide and delete them. See Sections. |
| 3 | Editor | The texts, photos and style of the section you picked. See Edit a section. |
| 4 | Media | Your photos: upload new ones and see where they are used. See Images. |
| 5 | Page | The title, web address and search engine texts of the page you're on. See Page settings. |
| 6 | Nav & Footer | The links in your menu bar and footer, and your social media links. See Menu and footer. |
| 7 | Site | Your site title, website languages, colours, fonts and background. See Site name, menu and footer and Colours and fonts. |
Your website is already live
You don't start from zero: your website's home page, with the booking form, has been online since your venue was set up — as version 1 of your website. In the toolbar you see:
- Live (green) — your website is online. Rest your mouse on it to see when it was last published.
- Up to date — guests see exactly what is in your draft. There is nothing to publish.

Nothing you do in the editor changes your live website until you click Publish. So feel free to look around and try things out. (A few things, such as your opening hours and your logo, come from your venue's information and are always current. See Draft and live website.)
Good to know
Does the label say Hidden instead of Live? Then your website is switched off, and guests see the standard booking page instead. See Hide your website.
Choose a template, or keep your design
A template gives you a complete website in one go — pages, sections and colours — ready to fill with your own texts and photos. This step is optional: you can also keep what you have and change it bit by bit.
-
Click the Templates button in the toolbar (the icon with three blocks).

The Templates button in the toolbar -
Look through the templates. Click Restaurant, Event Space or Event at the top to see only the ones for your kind of business.
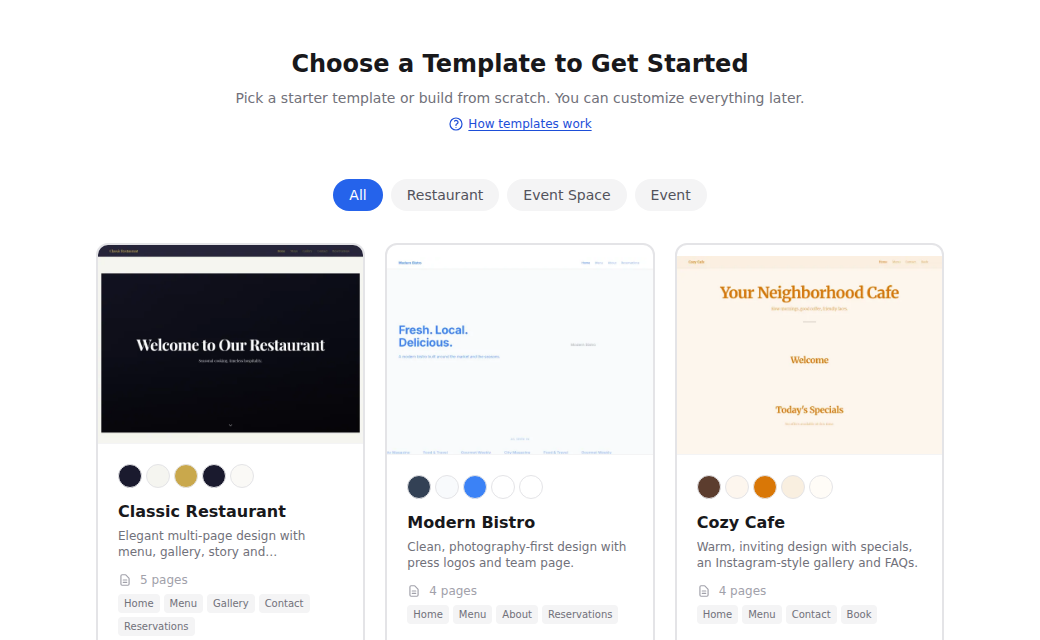
The template gallery: Choose a Template to Get Started -
Click the template you like to see what it contains, then click Customise. A short guide lets you decide a few big things and untick the pages and modules you don't want, and ends with Generate. If your draft already has content, the editor asks Replace your draft with this template? Click Replace draft to go ahead, or Cancel to keep your draft. See Templates.
-
The template is now in your draft. Replace its texts and photos with your own, then publish when you are ready.
Important
A template replaces everything in your draft: pages, sections and colours. Your previous draft is saved in the version history first, and your live website does not change until you publish. See Templates.
Tip
Changed your mind? Scroll to the end of the gallery and click Start from Scratch. When you open the templates from the editor, this simply closes the gallery — your draft stays exactly as it was.
Make your first change
Let's change the big headline at the top of your home page.
-
In the side panel, click the Sections tab, then click the top section — usually Hero, the big welcome picture.
-
The Editor tab opens. Click in the Headline field and type your new headline.
-
Watch the preview: after a moment it shows your new headline.
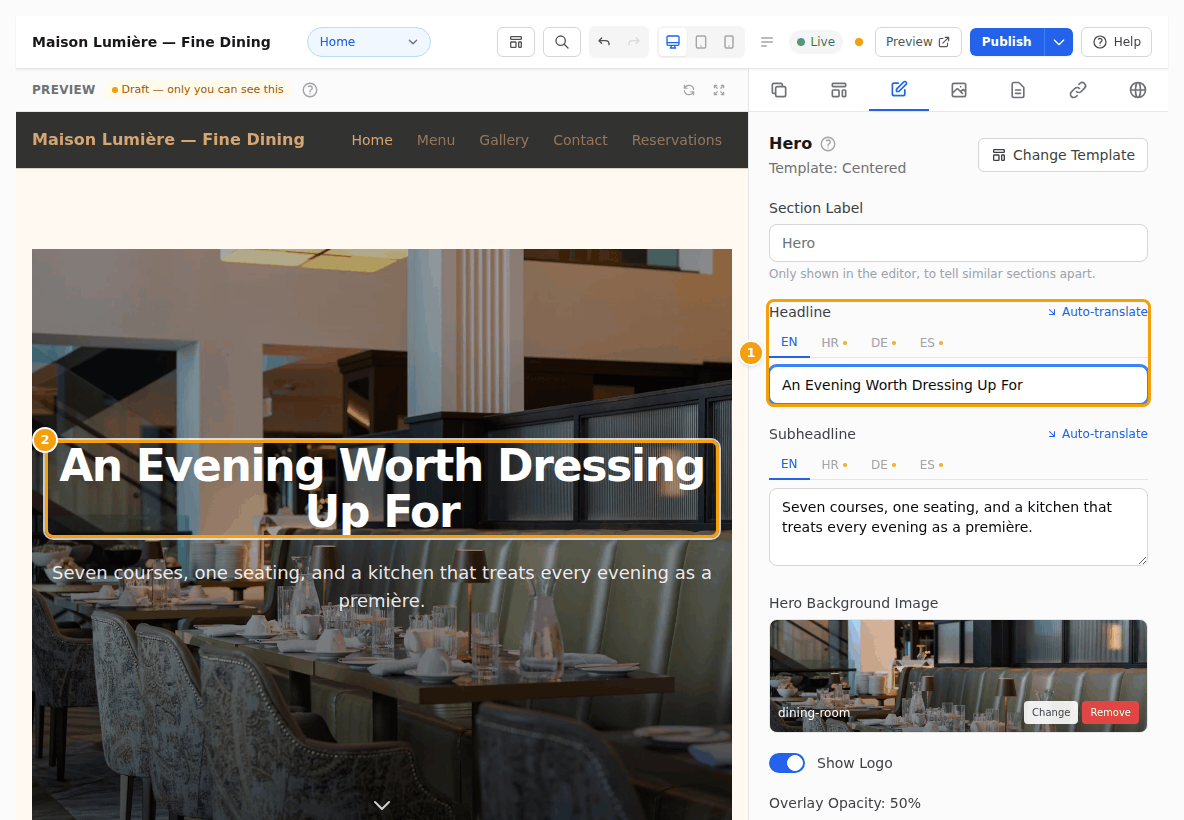
The Headline field (1) and the new headline in the preview (2) -
That's it — your change is saved to the draft automatically. At the bottom of the editor you see Saved to draft.
Your guests don't see the new headline yet. That is the next step.
Publish for the first time
-
Look at the toolbar: a small orange dot now appears next to Live, and the Publish button is blue. The dot means your draft has changes that are not on your live website yet. (On a very wide screen it also says Unpublished changes.) Click the dot if you want to read more about it.

The orange dot (1) and the Publish button (2) -
Want to check first? Click Preview to open your draft in a new browser tab. See Preview your draft.
-
Click Publish.
-
If you have added or removed pages, or your website was hidden, a window first tells you what will change. Read it and click Publish to confirm. Otherwise your changes go online straight away.
-
A green message says Published — your changes are live. and the button changes to Up to date.

The message after publishing, with Undo (1), and the Up to date button (2) -
Have a look at your live website: click the small arrow next to Up to date and choose View live site.
Tip
Published by mistake? Click Undo in the green message, and the previous version is online again. See Undo a publish.
Related
What next? Pick what you need: