Articles in this topic
Seating plan
Seat your guests at the tables of your room by dragging them, see who sits where, move or remove a guest, print the plan or export it, and let your guests see their own table on your party website.
7 min read
For the couple or host of a party.
The Seating Planner shows the room of your party with its tables. You place every guest at a table, and see at once how many seats are taken.
Good to know
The seating planner is part of the party only when your venue has switched it on and chosen the room for you. Until then the menu has no Seating Planner, or the page says "Your venue has not chosen the room yet — they will set it up for you". Ask your venue.
The planner at a glance
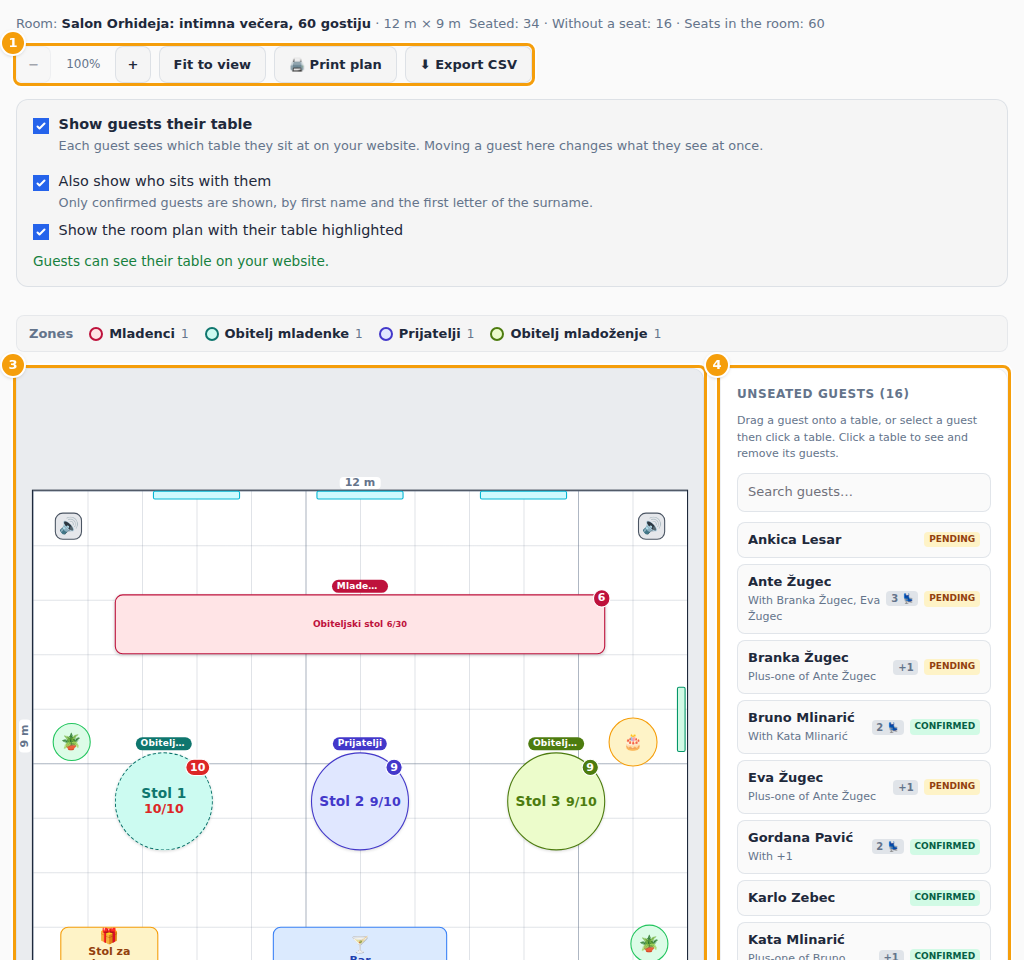
- (1) Above the room: Fit to view, the zoom buttons − and +, Print plan and Export CSV. A line shows the name and size of the room and the totals: Seated, Without a seat and Seats in the room.
- (2) Zones: your venue may group the tables into zones, such as "Family of the bride", each with its own colour. The legend names the zones and counts the tables in each.
- (3) The room with its tables. Each table shows its name and how many seats are taken out of how many it has, for example 9/10. A full table is marked red.
- (4) Unseated guests: everyone who still needs a seat. Use the search box to find a guest. A card tells you with whom the guest comes, and how many seats they need together.
Seat your guests
You can do it in two ways:
- Drag a guest from the list onto a table.
- Or select a guest in the list and then click a table.
The guest moves to the table, and the numbers change. A table that has no room for the guest, or for the guest together with their plus-ones, does not take them, and you are told how many seats are needed and how many are free. A guest who has cancelled cannot be seated.
Plus-ones take seats
A guest at a table needs a seat for themselves and one for each plus-one. A plus-one who already has a name goes with the guest: when you seat or move the guest, their named plus-ones follow. A plus-one without a name has no card of their own, but still takes a seat at the guest's table; the table shows it, for example "+1 with Ana Horvat". You can seat a named plus-one at another table on purpose: they stay where you put them.
See and change who sits at a table
Click a table to open its panel.
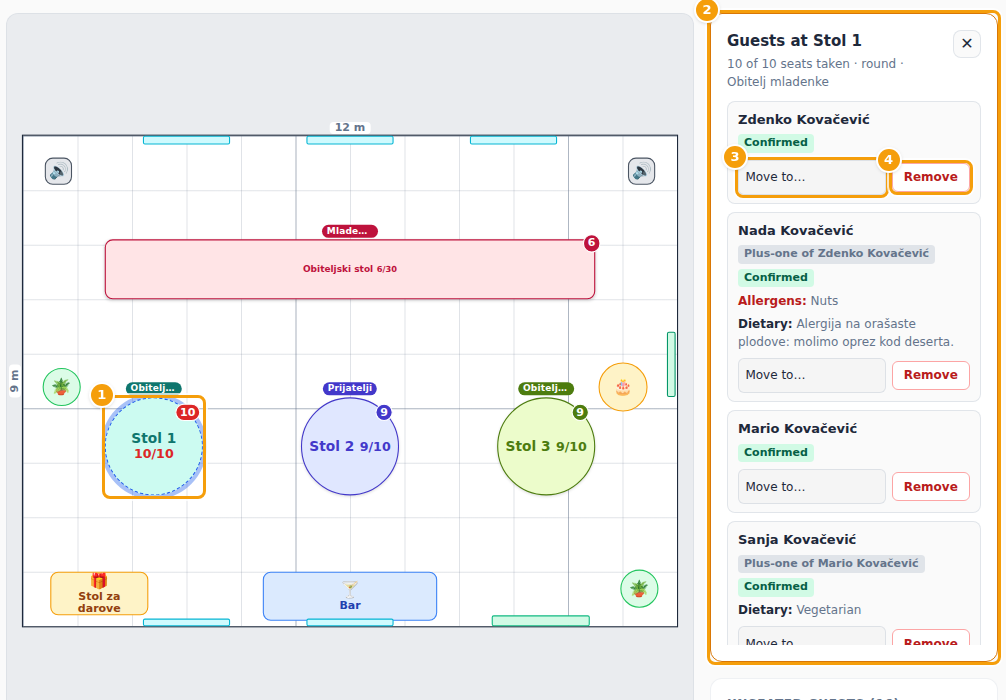
- (2) The panel lists the guests at the table, with their status, allergens and dietary notes, and how many of the seats are taken.
- (3) Move to… moves a guest to another table. The list shows only the tables that have room.
- (4) Remove takes the guest off the table, back to the list of unseated guests.
A guest who has cancelled still keeps a seat until you Remove them. Close the panel with the cross.
Print or export the plan
- Print plan opens a page with the seating plan that you can print or save as a PDF.
- Export CSV downloads a list of your guests and their tables, which you can open in a spreadsheet.
Use −, + and Fit to view to zoom the room while you work. This changes nothing for your guests.
Show your guests their table
On the day, your guests can find their table on their phone. Above the room there are the switches for it.
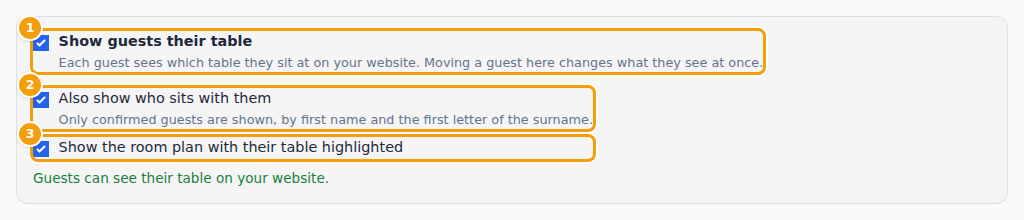
- Show guests their table: each guest sees on your website which table they sit at. While you are still moving guests around, leave it off: when it is on, a guest sees every change at once. The switch can be turned on when at least one guest is seated.
- Also show who sits with them: the guest sees the other guests at their table, by first name and the first letter of the surname. Only confirmed guests are shown.
- Show the room plan with their table highlighted: the guest also sees a drawing of the room.
The switches need a Your table page on your party website. If it is missing, the planner says so and offers Add the Your table page or Open the website builder. Publish the website afterwards. Everything about the page is in Your table.