Articles in this topic
Venue layouts
Draw your rooms once — size in metres, walls, tables, a stage or a bar, VIP zones — and give a layout to a party or an event so guests can be seated at its tables.
8 min read
A venue layout is a plan of one of your rooms as you set it up for an occasion: "Banquet 120", "Theatre", "Wedding round tables". You draw it once under Venue Layouts, and then give it to as many parties and events as you like. The organiser of a party seats the guests at its tables, and at an event guests can choose their table.
Good to know
A layout is a drawing, not your booking system. The floors and tables that decide which times guests can book online are set in Floors and tables. Layouts do not change them.
Look at the screen
Open Venue Layouts in the menu on the left of Party Management.
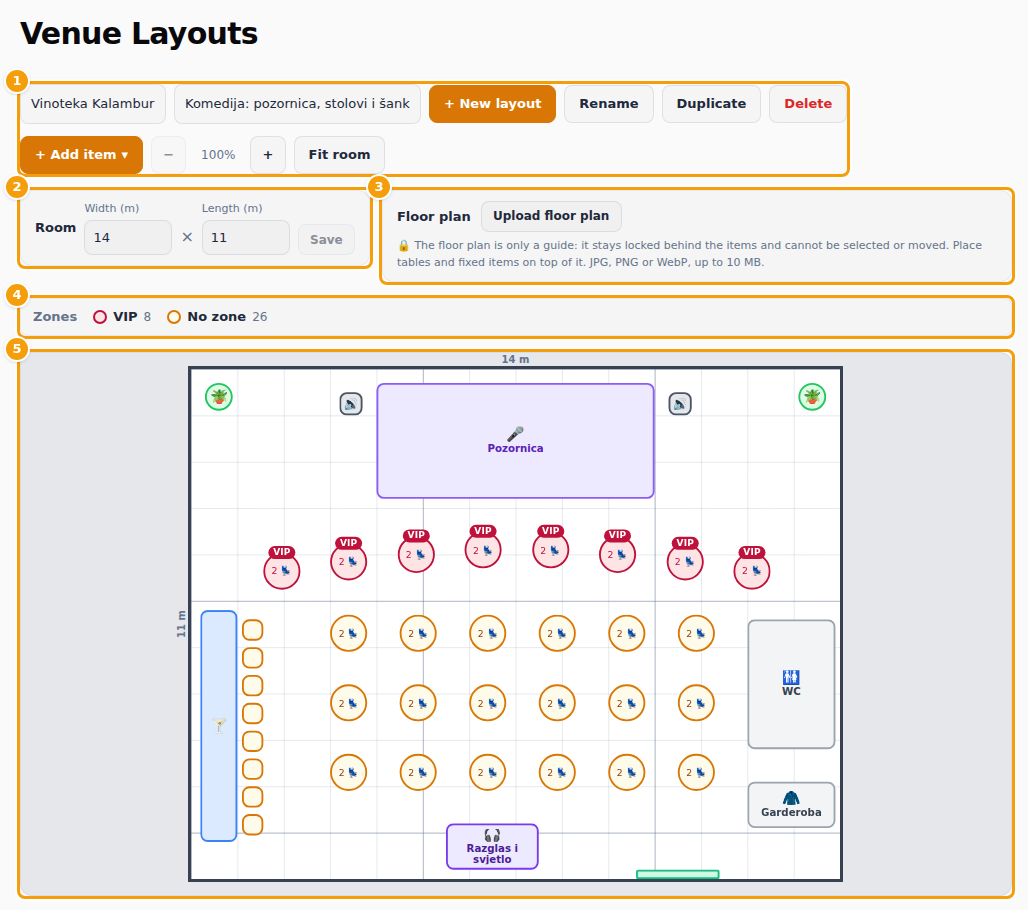
- (1) At the top, the first buttons are your locations — a brand with several locations picks one here — followed by the layouts of that location. Click a layout to open it. New layout, Rename, Duplicate and Delete work on the open layout. Add item and the zoom controls sit below.
- (2) Room is the real size of the room: width and length in metres.
- (3) Floor plan lets you upload a picture of the room to draw on.
- (4) Zones lists the zones you have given to tables, with the number of tables in each.
- (5) The room itself: a drawing in metres, with a grid.
Create a layout
- Click New layout.
- Type a name — a name you will recognise later, such as Banquet 120 — and the room's size in metres. The dialog starts with 10 × 8 m. Click Save.
- Add tables and fixed items (next sections). Click Duplicate to start a variation from an existing layout.
An empty layout says Empty layout. Add tables and fixed items such as a stage, bar or doors.
Set the room size
Under Room, change the Width (m) and Length (m) and click Save. A room can be 2 to 500 metres wide and long. Nothing can leave the room: if you make it smaller than the items in it, Clava tells you how many stick out, and you move them inside or make the room bigger. An item outside the room is marked Outside the room — drag it back inside.
Add tables and fixed items
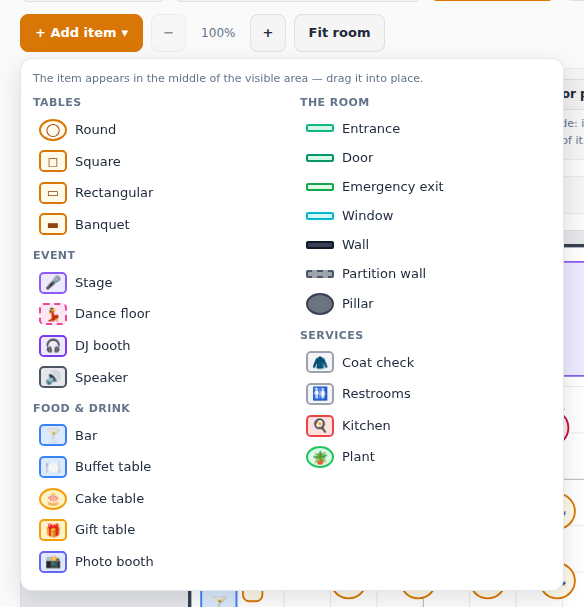
Click Add item and choose from the menu:
| Group | Items |
|---|---|
| Tables | Round, Square, Rectangular, Banquet |
| Event | Stage, Dance floor, DJ booth, Speaker |
| Food & drink | Bar, Buffet table, Cake table, Gift table, Photo booth |
| The room | Entrance, Door, Emergency exit, Window, Wall, Partition wall, Pillar |
| Services | Coat check, Restrooms, Kitchen, Plant |
The new item appears in the middle of the visible area. Drag it into place and drag its corner to resize it. Click an item to open Edit element:
- Type and Label — the label is the name shown on the drawing, for example Table 5 or Head table.
- For a table: Table shape and Seats (how many guests sit there).
- Zone (optional) — see Zones.
- The size in metres: Width (m) and Depth (m), or Radius (m) for a round item. Flip orientation swaps width and depth.
- Rotation (°) with the buttons −90° and +90°, and the position in metres (Position X (m) and Position Y (m)) when you want to be exact.
- Delete element removes it, after you confirm.
Walls, doors and pillars are fixed items: guests cannot be seated at them, but they show the real shape of the room to you and to the organiser.
Zones
A zone is a name you give to some tables, for example VIP or Bride's family. Open a table, type the name under Zone (optional) — or click one you used before — and save. Each zone gets its own colour on the plan, and the Zones line above the room shows how many tables each has; No zone counts the others.
Zones matter for events: a ticket type can be tied to a zone, so the guests who buy it can only choose tables in it. Tables without a zone are for tickets without one. See Tickets and table choice.
Zoom and move around
+ and − zoom in and out; 100% is the whole room. Fit room brings the whole room back into view. To move around a zoomed plan, drag the empty background.
Draw on a floor plan
If you have a picture of the room, click Upload floor plan (JPG, PNG or WebP, up to 10 MB). It is placed behind the items and stays locked — you cannot select or move it, you place tables and fixed items on top of it. Set its Opacity and Width (m) so that it lines up with the room, or click Fit to room. Replace floor plan and Remove floor plan change or take it away; removing it leaves your tables and items where they are.
Give a layout to a party or an event
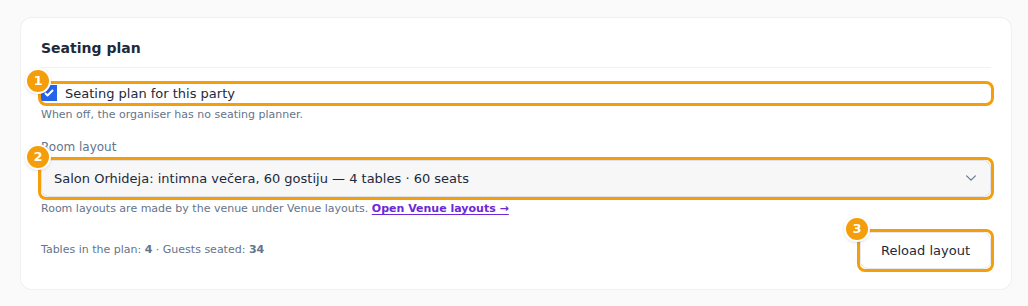
- A party: in the Party Manager, open the party, go to Options → Seating plan, tick Seating plan for this party, choose the Room layout and click Save Changes. The organiser then has the seating planner with your tables.
- An event: choose the Seating plan when you create the event. It can be changed until the first table is reserved.
The party gets its own copy of the layout. If you change the layout afterwards, open the party and click Reload layout: the party's tables are replaced with the layout's current tables and items. Guests who sat at a table keep their place if a table of the same name still exists, and everyone else returns to the unseated list.
Tips
- Name tables in a way the organiser and guests will understand: the name is what they see on the plan and in the lists.
- Put the room's real measurements in first. Everything else is drawn in metres, so tables keep their real size.
- Keep one layout per set-up, and use Duplicate for variations.