Articles in this topic
Create a party
Add a party yourself in five short steps — when it is, who the organiser is, how guests are invited and whether a deposit is paid — and see what Clava creates.
6 min read
Most parties start as a request from a guest (see Party Requests). When a client has agreed something with you by phone or in person, you add the party yourself with Create Party.
Open Create Party in the menu on the left of Party Management, or click Create Party under Quick Actions on the dashboard. Five steps lead you through. The numbered circles at the top show where you are; click a step you have already visited to go back to it, or use Back and Next. Required fields have a red star, and Next stays on the step until they are filled in.
Step 1: Basic info
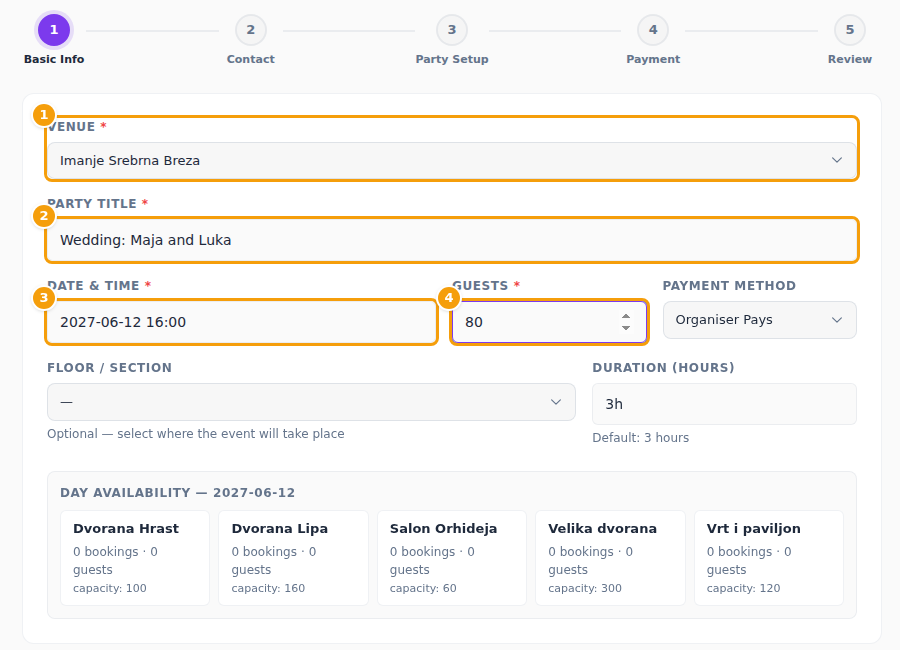
- Choose the Venue (1) — your location.
- Type the Party Title (2), for example Wedding: Maja and Luka. It is the name you see in your lists. It may have 45 characters at most.
- Click Date & Time (3) and choose the day and the start time.
- Enter the number of Guests (4). It starts at 6.
- Optional: Payment Method says who pays for the party — Organiser Pays (the preset) or Participants Pay.
If the location has floors, two more fields appear: Floor / Section (where the party will be; optional) and the Duration (hours) of the booking, from 2 to 6 hours. The preset is 3 hours. Once you have chosen a venue and a time, Day Availability shows, for each floor, how many bookings and guests there already are that day and the floor's capacity — use it to see whether the day is realistic.
If the location books by table, a list of Tables / sections appears and you must choose at least one table or a whole section for the party. Tables already booked at that time cannot be chosen, and a counter shows how many seats you have chosen against the number of guests. See Floors and tables.
Step 2: Contact
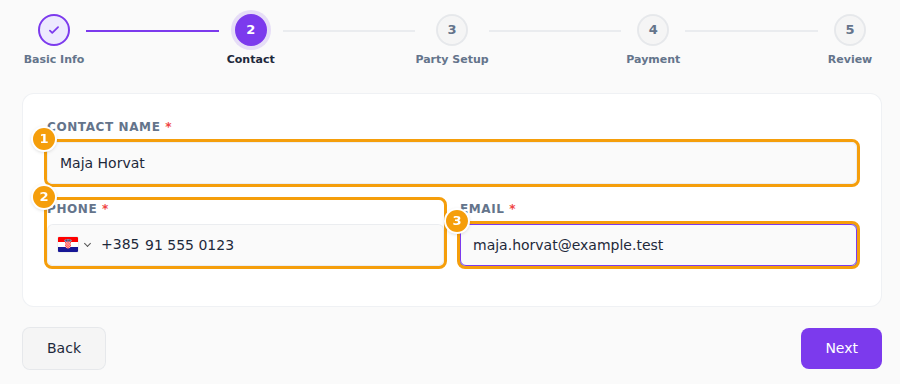
Enter the organiser — the person who hosts the party and will plan it with their own tools: Contact Name (1), Phone (2) and Email (3). All three are required. The phone number is checked: pick the country at the flag if it is not the preselected one. The email must be real, because the organiser's sign-in link goes to it.
Step 3: Party setup
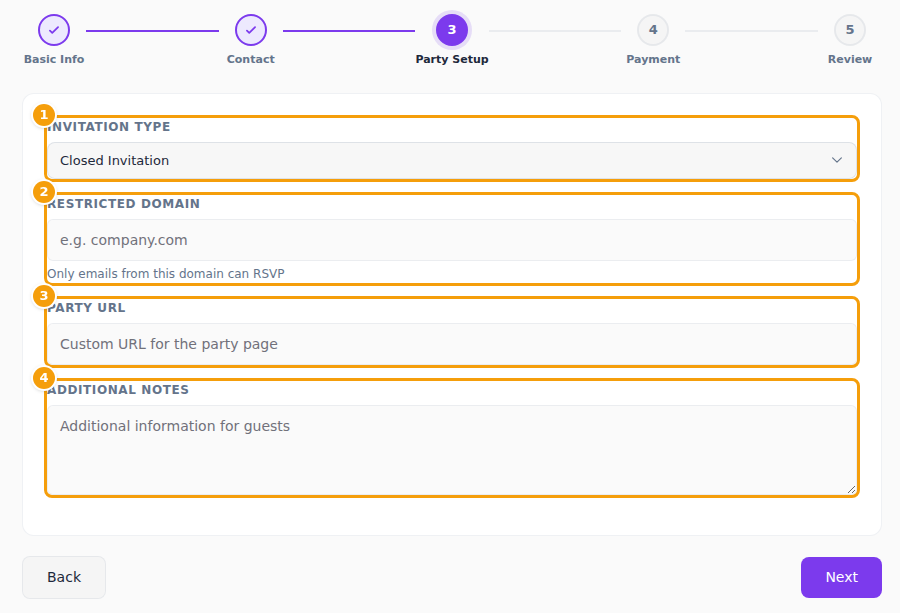
Nothing is required here.
- Invitation Type (1): Closed Invitation (preselected), Open Invitation or Member Get Member. Closed suits a wedding: only the people on the organiser's list take part, and the party's website is private by default.
- Restricted Domain (2): only email addresses from this domain, for example company.com, can answer the invitation. Useful for a company dinner.
- Party URL (3): the address of the party's web page. You can change it later in the Party Manager.
- Additional Notes (4): any further information about the party. It is kept with the party as Notes / Comments.
Step 4: Payment
Set the deposit. Deposit Status is Unpaid (preselected), Paid Online, Paid or Free (no deposit). Unless it is free, enter the Amount and the Currency (EUR, GBP or USD). For Paid Online the Transaction ID of the payment is also required.
Step 5: Review and create
The last step lists everything you entered. Each section has an Edit button that takes you back to its step. When it is right, click Create Party.
What happens next
- The party appears in the Party Manager with the status Requested, and you land on it straight away, on its Options tab.
- The party also takes its place on your booking calendar at the time you chose, on the floor or tables you picked.
- The organiser is not told yet. When you are ready, click Send Welcome Email on the Options tab: it sends the organiser a link to their own area, where they build the guest list, choose menus and seat guests. See The Party Manager.
- Change the status to Confirmed when the party is agreed.
Tip
Nothing is saved until you click Create Party on the last step. If you leave the page earlier, no party is created.